My little sister asked me to do her makeup over the weekend and I jumped at the chance--I need all the practice I can get if I want to do this in the long-run. I drove over, not knowing exactly what kind of look she wanted, with almost all of my makeup in tow. Side note: At least I know that I'm building some arm muscles with the weight of everything. Ha.
I walk upstairs to find Abigail curling her hair and she was wearing a white tank with these cute tan and teal high waisted, flowy shorts. I thought she was going out-out but said she was just going to play cards at a friend's house.
As I finished braiding her bangs back, she said she wanted to try a makeup look with some sort of color under her eyes. Easy peasy! Now I just need to figure out what color to pick.

Showing posts with label makeovers. Show all posts
Showing posts with label makeovers. Show all posts
Monday, August 11

Monday, February 10
Makeover Madness: Beauty at Any Age
I decided recently that I wanted to give my mom a makeover--not that she really needed it. She's one of those women who age really well decade to decade and I'm thankful I've got her DNA. If I can look as good as she does when I'm her age then I'm going to be one hot mama. You should all be, what do they call it nowadays.... JELLY!
But I still need practice with my makeup artist skills. So that's where today came into play. I didn't really have a "set look" for her but I do know that I wanted to play up her eyebrows and the colors on her cheeks. She's also been on the hunt for a nude/pink color for her lips so we played with that as well.
Disclaimer: I'm still working on my photo taking skills, so bear with me...
FACE
Concealer: ELF Studio Under-Eye Concealer in Medium
Loose Powder: NYC Translucent Powder
CHEEKS
Bronzer: Sephora Bronzer in Los Cabos
Blush: NARS blush in Orgasm
Highlighter: Benefit Watts Up! Highlighter in Luminous Champagne
EYES
Brows: LORAC Take a Brow Kit in Brunette (used the darker color)
Concealer: MAC Studio Finish Concealer in NC20
Eyelid Primer: MAC Paint Pot in Painterly
Eyeshadow: Urban Decay Naked Palette 1
Eyelids--Toasted
Crease--Buck
Outer corner--Hustle
Lower lash line--Buck
LIPS
Lipstick: NYX Lip Creme Lipstick in Iced Honey
One thing I know I need to work on is cheek color. It seems like a lot when I'm inches away from a face, but when I back up or take someone outside, it looks like there isn't any color at all.
I chose the colors from the Naked palette based on her green eyes. I thought with the nude/rose/purple colors, they would pop! And I was totally right.
She didn't care too much for the lip color because of the shimmer, but overall, I think it was a good tone. I wanted to use a gloss that I've had for years but didn't bring it with me.
So what do you think? Comment below and tell me what you would have used on your mom!
Monday, December 30
NYE: UD look no.2
So I don't know about you, but I love going out on the town for New Year's Eve. Going out as in getting all gussied up with sparkles and falsies and champagne in our hands. Even though I'm still learning my own MUA secrets and signatures, I wanted to show you what my face would be like on NYE.
From what I've seen, most girls either go with golds or silvers with a LOT of whites/creams in their outfit. And since I've been coveting gold lately, I wanted to change it up a little and go with silvers and grays!

From what I've seen, most girls either go with golds or silvers with a LOT of whites/creams in their outfit. And since I've been coveting gold lately, I wanted to change it up a little and go with silvers and grays!
Monday, November 4
Makeover Madness: Drama, Baby.

It's been a little while since I've done a makeover post and I'm very excited about it! My co-worker, Alex, brought me a picture from this month's issue of Real Simple and asked that I apply that look to her face. It was a very dramatic cat/smoky eye and I was a little nervous with the outcome because it's not her usual look. But, of course, I jumped at the opportunity. And I can feature her on the blog. Duh.
Luckily I had brought my makeup with me to work and we were able to play on break. The browns almost had some purple and/or black to them so I pulled several colors from my makeup bag and just blended on her eyes until I achieved the desired look.
BEFORE

AFTER


[one] Swipe a medium to dark brown eye shadow over the entire lid.
-- I used Victoria's Secret wet/dry shadow in Espresso Lane. (currently no longer sold)
[two] Blend a lighter brown in the crease from side to side.
-- I used Mac eye shadow in Haux.
[three] To achieve the drama, swipe the same medium to dark brown color under the eyes and up towards each outer corner towards the brows. Make that line as a starting point.
-- I used the same brown from Victoria's Secret in step 1.
[four] Once that is made, blend the outer corner to that line with a darker brown/purple-ish color.
-- I used a color called Hustle from the Urban Decay Naked palette.
[five] If you want even more smokiness, you can blend black in the outer corners as well.
-- I used Covergirl shadow in Shimmering Onyx.
[six] Line the eyes with a black liner and if you want it smudged, that still works with this look. Also line the lower lash line but only the outer two-thirds.
-- I used something from my September Ipsy bag. It's a Kohl liner by Starlooks in Obsidian.
[seven] Use a smaller brush to dab a lighter, shimmery color in the inner corners of the eyes.
-- I used a color called Sidecar from the Urban Decay Naked palette.
[eight] Apply two coats of mascara to the top and bottom lashes.
-- I used Benefit's They're Real mascara.
Alex used a rosy lip color but a nude color works beautifully as well.
I love makeup on people when it is not their norm because it's so much fun to change it up every once in a while. Since I've always featured the eyes on Alex, I might just have to try something different next time. Maybe barely-there eyes and a colorful lip? Or maybe smoky eyes with no mascara for more of a Bohemian look? Orrr maybe cat eyes?
Thursday, August 29
From desk to dinner.
desk to dinner:
5 easy ways to go from
day job to DATE NIGHT!

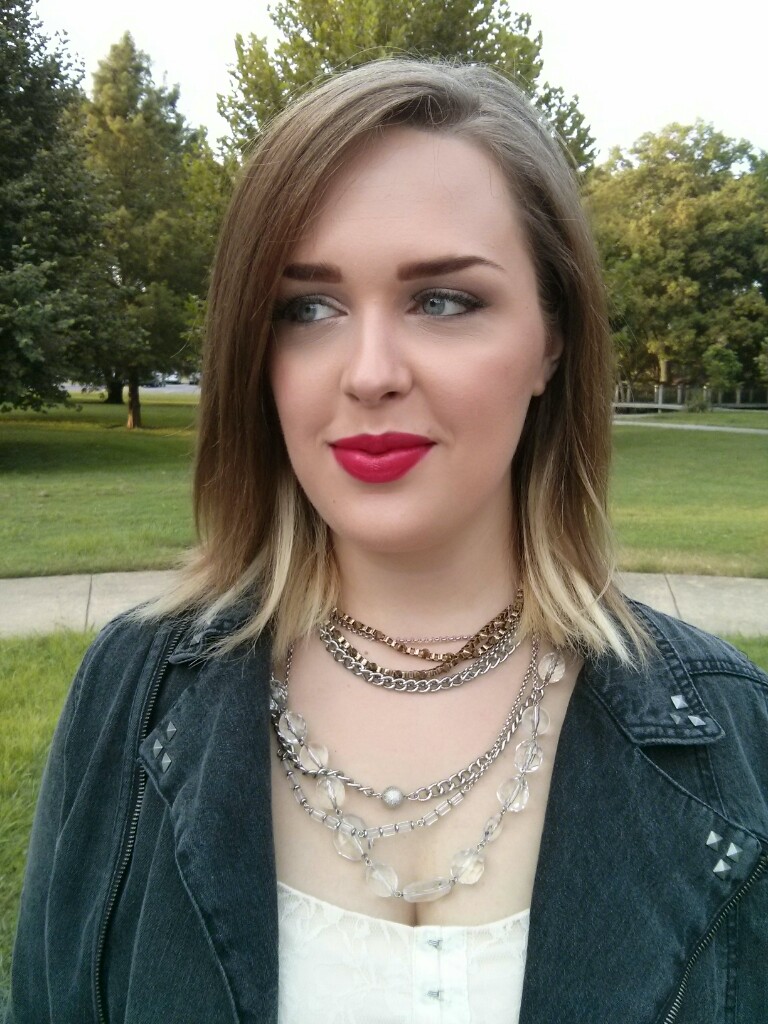
I kept my makeup minimal today since I was rocking the bold lipstick. I wore a light color on my lid and a light brown in the crease to give my eye a little depth. To add to it for an after-work look, all I did was draw on some black liner on top and along the waterline on the bottom. Easy peazy.
pump up the volume
Let's face it. Hair doesn't always do what we want it to do. You tell it to stick up and it lays down. You tell it to be curly and it stays straight. When you've got a date planned during the week after work, I would suggest carrying a travel-sized bottle of volumizing spray. Lean over and toss your hair over your head. Spray all over and work in between with your fingers. Stand back up, flipping your hair back, and you should have tons of volume!
change jewelry accessories
With a dressy outfit for work, I wanted to play down my accessories. But going out I wanted to mix up metals and double wrap two of my favorite necklaces.
add/remove clothing accessories
I decided to trade the green blazer for a black denim motorcycle jacket. These jackets are hott for the coming Fall fashion season and I completely forgot about it until I was trying to write this post and was pulling pieces from my closet. Instead of changing jackets, you could just remove it. Just another option.
change shoes
The other easiest change from desk to dinner? Trade out your shoes. I'd wear heels every day of my life if I could but I know most work places only allow conservative wardrobes. Either way, pack some killer heels and pop those babies on for a night out on the town!!
Dress (Target) | Nude Pumps (Target-similar) | Green Blazer (Forever 21-similar) | Glasses (Claire's)
Motorcycle Jacket (PackSun-similar) | Nude and Black Heels (Charlotte Russe-similar) | Gold Necklace (Urban Outfitters-similar) | Silver Multi-chain Necklace (New York & Co-similar) | Ring (Charlotte Russe-similar) | Clutch (Target-similar, similar) | Sunglasses (Forever 21)




Tuesday, August 27
5 minute makeup
You've overslept and the clock is ticking for you to get out the door in five minutes. Five minutes?! Are you frickin' kidding me?? Well, what do you do?
Personally, even when I do oversleep, I don't skimp time with my makeup. If I were at a different job, then maybe I'd have to reevaluate my priorities. But for now, let's play along.
There are really only five essential products that you need from your makeup bag to "Make it work!" as Tim Gunn would say. You might not be able to experiment with any new eye shadows but these products can get you out the door looking fresh, cute, and still put together.
1. SMOOTH on some creamy yet light foundation so that it covers your entire face. BB, CC, or DD cream would be perfect for this! Also make sure to find something with spf in it to protect your skin.
2. BRIGHTEN your newly covered complexion with a peachy-colored blush. Peach is a universally flattering color. Apply it to the apples of your cheeks and blend away towards your temples.
3. CURL your eyelashes with a product like E.L.F. lash curlers. Some makeup artists swear by their curler brand but I haven't found any differences. You can't beat this one for $1.
4. LENGTHEN your eyelashes with black mascara. One of my favorites is Maybelline Mega Plush mascara. Even when you're not wearing eyeshadow, a dramatic set of lashes can make you look polished.
5. TINT your lips with some colored chapstick. Let's face it, we probably have at least one tube of tinted chapstick floating around in the bottom of our purses. Or if you're a lipgloss kind of gal, wear something sheer and pink so that there is still color but it's not overbearing with the rest of your face.
Now hit the road, Jack!!
If you're like me and take more than five minutes (or thirty) on perfecting your makeup look for the day, are you up for a challenge? I challenge dare all of you to find five products in your makeup bag that would complete your look for a day. If you need more, then cool! But see if you can apply it all in under five minutes.
123go!!
Sunday, June 30
Makeover Madness: Rocker Trash
I use the term "Rocker Trash" because this makeup look reminds me of the singer Kesha. She categorizes herself as "Garbage Chic" and that's what I'm hoping to achieve today. I first saw a similar look on Keiko Lynn's blog, but that was over a year. I must have subconsciously remembered it without remembering she did it first. So I'm linking it with her name if you want to see how she achieved the look.
I've had this pigmented pot of eyeshadow from MAC for a couple of years now and have hardly used it. I see it every day in my makeup bag so I wanted to bring it out in a post and that is what inspired me to do this look.


Since my eyes were so heavy, I wanted to keep the lips neutral. But if you wanted to try something like Keiko Lynn's model, this is what it would look like with a bright lip.


Are there any eyeshadows in the bottom of your makeup kit that you don't use that often or that you've forgotten about? What looks have you experimented with? I want to hear them all!!
If you would like to see a tutorial or pic-torial on this look, comment below. You know you want to :-)
I've had this pigmented pot of eyeshadow from MAC for a couple of years now and have hardly used it. I see it every day in my makeup bag so I wanted to bring it out in a post and that is what inspired me to do this look.
Products I used:
MAC Paintpot in Painterly.
MAC Pigment Eyeshadow Pot in Golden Olive.
Urban Decay Naked Palette in Virgin and Creep.
Rimmel London Exaggerate Full Color Eye Definer in Noir.
Maybelline Mega Plush Volume Express in Blackest Black.
Bobbi Brown Semi-Matte Lipstick in Uber Beige (picture above).
Maybelline Color Sensational Lipstick in Hot Plum (picture below).
Since my eyes were so heavy, I wanted to keep the lips neutral. But if you wanted to try something like Keiko Lynn's model, this is what it would look like with a bright lip.
Are there any eyeshadows in the bottom of your makeup kit that you don't use that often or that you've forgotten about? What looks have you experimented with? I want to hear them all!!
If you would like to see a tutorial or pic-torial on this look, comment below. You know you want to :-)
Sunday, June 16
Makeovers: My sister-in-law, Jessica
First off, let me start this post by saying HAPPY FATHER'S DAY to all those specials dads and dad-figures in our lives! I know so many of them have huge impacts in our lives and they deserve a special day. Take them out to eat and offer to pay. Or just offer to do whatever they normally do around the house and take it off their hands. Tell them how much they mean to you. My dad's uncle passed away several days ago so he's in Florida for the memorial service. Otherwise, I'd be a picture taking fool on this holiday. :-)
Jerbear and I went over to his dad's house for lunch and while we were there, I asked his sister to do her makeup. Jessica is my height and only--wait for it--twelve years old. She seems like a baby but in reality, if you didn't already know her, you'd think she was sixteen or seventeen. It honestly blows my mind how grown up she looks.


Jerbear and I went over to his dad's house for lunch and while we were there, I asked his sister to do her makeup. Jessica is my height and only--wait for it--twelve years old. She seems like a baby but in reality, if you didn't already know her, you'd think she was sixteen or seventeen. It honestly blows my mind how grown up she looks.
Gorgeous, right?!
Not that Jessica really needs a makeover (none of my girls do) but it's always fun to play around with the makeup and see what kind of transformation we can find. She just recently cut her hair and donated it to Locks of Love so her short hair makes her look even older.
Anyway. I've only been doing these makeovers for a couple of weeks now and I'm sure you're all tired of seeing the same faces over and over again. So that was why I wanted to show you this lovely lady's face. I used the makeup she already had in her bag. Let's get on to the pictures!!
This was her before picture. I believe she only had on mascara.
And this is after! I applied a tinted moisturizer from ELF as well as bronzer and blush.
The color on her eyelid is a baby pink, the crease was a pretty silvery/taupe color, and the outer corner was a rich purpley/wine color. And then her brow was highlighted with a champagne color.
Her eyes were lined with an eyeliner called Rich Coffee and completed with some mascara. I chose this particular eyeliner because it complimented her eye/skin color and I wanted to keep her looking twelve.
And here is her before and after picture.
(And just in case your'e wondering where this dress came from, it's from Express! I NEED it in my closet, as I'm sure we all do.)
And this completes another makeup session by yours truly. I'm in the mood to do something funky next time. So I'm calling out to all my brave girls who aren't afraid to experiment with colors. Let's all have fun!!
Saturday, June 15
Every day makeup look for work Tutorial
Where do I begin when it comes to telling you how much I love makeup? Well, I do... a lot. Whether I make this my career or not, it will always hold a very special place in the creative side of my heart. I wanted to upload a tutorial of one of my favorite work looks that shows a neutral eye with bright lips. I'm very excited about it. So without further ado, I made a video tutorial on my YouTube page that shows you the colors as well as how to apply them.
Disclaimer: This is my first video post and it will be featuring MY face, not someone else's, so I'll try to get it done without being too awkward. And I have very little editing skills so I'm going to try and get this done in one take.
Disclaimer no.2: I also noted after watching the video that my bathroom has HORRIBLE lighting. Please ignore that. I'll look into recording in front of a window next time...or something.

And there you go! I can already see the areas that need improving but I hope you can see through that and take what you need from the tutorial.
Have fun with your makeup and don't be afraid to try new things!!
Disclaimer: This is my first video post and it will be featuring MY face, not someone else's, so I'll try to get it done without being too awkward. And I have very little editing skills so I'm going to try and get this done in one take.
Disclaimer no.2: I also noted after watching the video that my bathroom has HORRIBLE lighting. Please ignore that. I'll look into recording in front of a window next time...or something.
Here's a funny picture I took before we headed out tonight. It shows you better lighting.
And there you go! I can already see the areas that need improving but I hope you can see through that and take what you need from the tutorial.
Have fun with your makeup and don't be afraid to try new things!!
Friday, June 14
Makeover Madness: Smokey Eye
It's time for another edition of Makeover Madness.
Today, I applied the "smokey eye" to my co-workers Amy and Alex. One of these days I'll get around to uploading a tutorial with my own face. Tutorials really show how the brushes work their magic. But until then, here are their beautiful faces and the colors I chose for their smokey eyes. Alex wanted me to copy a look from Lauren and her Red Mahogany Smokey Eye tutorial. Lauren demonstrated her look all the way from face moisturizer to falsies. And although we didn't put as much on our face, I'll still let you know of the products we used.
Here is Lauren's tutorial for the Red Mahogany Smokey Eye. And in case you cannot click on the link, the video is below and will play within this post.


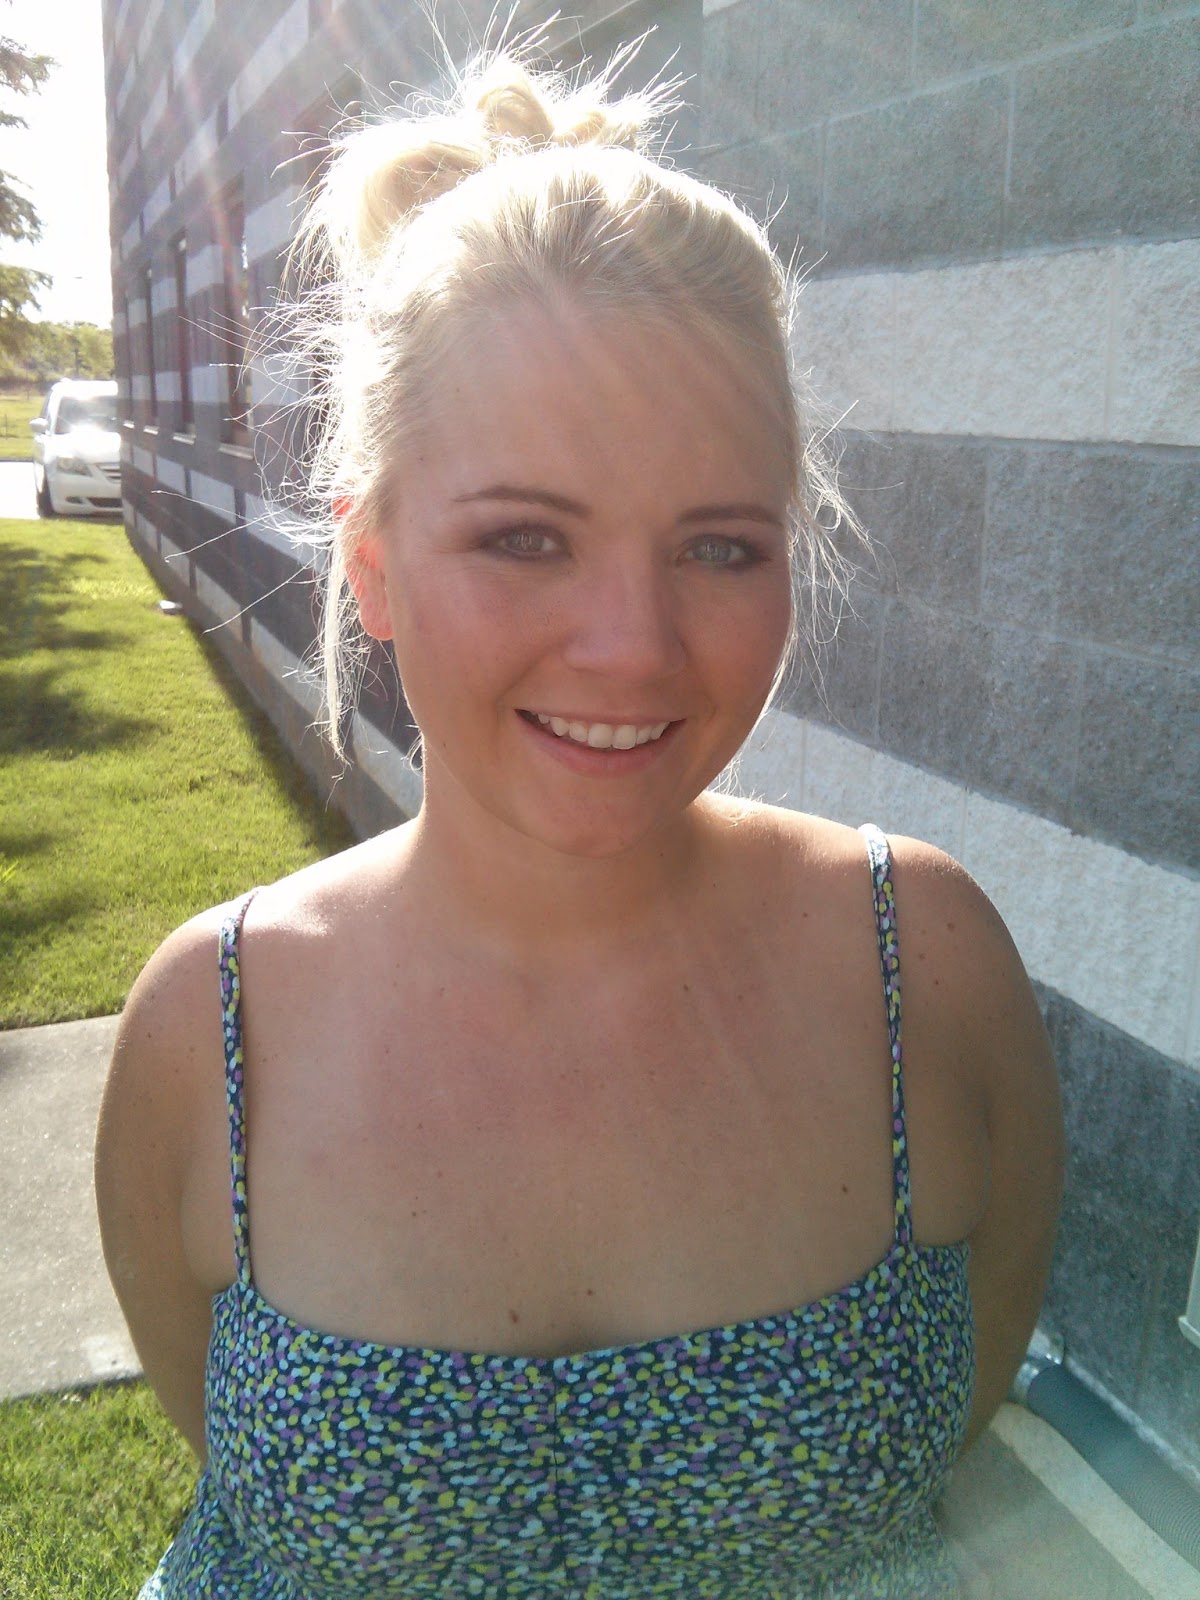


Today, I applied the "smokey eye" to my co-workers Amy and Alex. One of these days I'll get around to uploading a tutorial with my own face. Tutorials really show how the brushes work their magic. But until then, here are their beautiful faces and the colors I chose for their smokey eyes. Alex wanted me to copy a look from Lauren and her Red Mahogany Smokey Eye tutorial. Lauren demonstrated her look all the way from face moisturizer to falsies. And although we didn't put as much on our face, I'll still let you know of the products we used.
Here is Lauren's tutorial for the Red Mahogany Smokey Eye. And in case you cannot click on the link, the video is below and will play within this post.
Before I show you Alex's pictures, I REALLY need to find the lighting like Lauren has in this video. It would make tutorials so much more effective!!
Lauren uses Maybelline's Color Tattoo eye shadow in Pomegranate Punk. I don't really like creamy shadows because, at least on my eyelids, the cream seems to sink in the creases. It makes me look oily and like the shadow has been on my eyes for 15 hours. Luckily I had another MAC eyeshadow in my makeup bag. It was the perfect base compared to the Color Tattoo.
Alex before:
Sorry about her squinty picture. I used a reflective shield from my car window and it was super bright.
We used liquid foundation instead of powder this time and I love that it still shows her freckles.
I also didn't want to apply this smokey look too heavy because Alex doesn't normally do this on her own. It was a good medium for the both of us.
My new favorite makeup product? Brow shadow. Let me make over your brows!!
This mahogany color is the PERFECT alternative to the typical gray/black smokey eye.
Covergirl TRUblend Foundation in Ivory
Everyday Minerals Matte Base Powder in Fair Neutral
Sephora Bronzing Powder in Los Cabos
Everyday Minerals Cheek Blush in Rhapsody in Peach
Lorac Take a Brow in Brunette (I used the darker of the two colors)
Elf Eyelid Primer
MAC Mega Metal Shadow for the lid in Sexpectations
Loreal Infallible Eye Shadow used for the top shadow on the lid in Glistening Garnet
MAC eye shadow for highlighting the brow in Phloof
Rimmel Exaggerate Full Colour Eye Define for lining her eyes in Noir no.261
Maybelline Falsies Mascara in Black Drama
Amy wanted to do the same smokey eye look as Alex but I decided to apply purples instead. Both purple and mahogany work beautifully on any eye color.
Amy before:
I did Amy's purple smokiness a little heavier than Alex's and it still looks just as dramatic without the color being as drastic as black.
I haven't tried to mahogany on myself yet but I have used the purple. It pairs best with green eyes but still makes blue eyes POP.
When applying a smokey eye like this, whatever color you choose, always use a nude color for your lips. Keep the attention on your eyes. Otherwise, you might be pushing the "over done" look.
Again, new favorite thing? Brows, brows, and brows!
Covergirl Loose Powder in Translucent Medium
Clinique Even Better Concealer in Buttermilk
Sephora Bronzing Powder in Los Cabos
NARS blush in Orgasm
Lorac Take a Brow in Brunette (I used the lighter of the two colors)
MAC eye shadow for highlighting the brow in Phloof
MAC eye shadow for the lid in Fig
Korres eye shadow used for the top shadow on the lid in Plum
Rimmel Exaggerate Full Colour Eye Define for lining her eyes in Noir no.261
Maybelline's Mega Plush Lash Mascara in Blackest Black
Here is Amy and Alex together.
Sorry about that crazy spot on Amy's cheek. I promise, it was the sun!
Here's Alex before AND after.
And here's Amy before AND after.
Gorgeous, gorgeous, and GORGEOUS!!
Monday, June 10
Makeovers: Alex and Amy
I've got another makeover for you!! It's the same girls I worked on last Friday, Alex and Amy. If you remember from this post, I made a few promises to you. I wanted to find better lighting, less distracting backgrounds, and take before-and-after pictures. I would say today was a 90% success! I was able to find all of the specifications for Amy, but Alex already applied her foundation and I didn't get a before picture with her. Next time!


Amy, before:
Amy, after!
These are the products I applied on her face:
Bare Escentuals Mineral Powder in Medium Beige N20
Clinique Even Better Concealer in Buttermilk
Sephora Bronzing Powder in Los Cabos
Covergirl Cheekers Blush in Plumberry Glow N140
Lorac Take a Brow in Brunette (I used the lighter of the two colors)
Clinique Bare Brilliance Lipstick in Blushing Coral
These are the products I applied on her eyes:
MAC Mega Metal Shadow for her entire lid and beneath her lower lashes in Sexpectations
MAC eye shadow for the crease in Haux
Mac eye shadow for highlighting under her brow in Shroom
Urban Decay Naked Palette for the inner corners in Sin
Loreal Hip Studio Secrets Metallic Shadow for the outer corners in Electrified
Rimmel Exaggerate Full Colour Eye Define for lining her eyes in Noir no.261
These were all products that I already use on a daily basis. I would not recommend going out and buying all of these colors if you are looking to achieve something similar. Play around with what you have and you'll be amazed at what you can put together.
Here's a side by side for your viewing pleasure :-)
And now it's time for Alex's after picture!
It's crazy what a little makeup does to this girl.
Lorac Take a Brow in Brunette (I used the darker of the two)
Sephora Bronzing Powder in Los Cabos
NARS blush in Orgasm
Urban Decay Naked Palette: Highlight beneath the brow in Virgin, the entire lids in Sidecar, the crease in Toasted, the outer corners in Hustle, and the inner corners in Sin
And there ya go!! Makeovers are complete and both girls look gorgeous!!! Stay tuned for our next makeover. It could be YOU.
Subscribe to:
Posts (Atom)