Showing posts with label tutorials. Show all posts

Monday, January 6

DIY Envelope Pillow Cover


I'm not much of a seamstress. You got me. I don't even know how to sew by hand so you can imagine the success I'd have with an actual sewing machine. But in my binge browsing of Pinterest, I found this super simple tutorial on YouTube that showed you how to make an envelope pillow cover.

I know I'm not the only one but I change out the bed's comforter as the seasons change. It's really only twice a year. As you can imagine, we've got lighter colors for Spring and darker colors for Winter. So rather than buying more pillows, this tutorial helped me to make new covers.

I picked out plain brown, dark tan with small gold polka dots, and cream with tan hatchmark lines for the pillows in the bedroom. Then I had two other pillows in the living room I needed to recover and I chose cream & gold threads woven throughout to go with the multi-colored quilt draped over the back of the couch.

Monday, December 30

NYE: UD look no.2

So I don't know about you, but I love going out on the town for New Year's Eve. Going out as in getting all gussied up with sparkles and falsies and champagne in our hands. Even though I'm still learning my own MUA secrets and signatures, I wanted to show you what my face would be like on NYE.

From what I've seen, most girls either go with golds or silvers with a LOT of whites/creams in their outfit. And since I've been coveting gold lately, I wanted to change it up a little and go with silvers and grays!


Thursday, December 19

DIY Christmas tree decor

I learned about this DIY Christmas decor when my family used to live in Chattanooga--15 years or so ago--from our hairdresser. He was quite the stylish man from what I can remember and always feathered my hair just like Farrah Fawcett. I hated it, but it was all the rage. That's besides the point. He showed us a practically free way to re-use some things in our home as Christmas decor.

We've all got stacks and stacks of magazines under the coffee table or in a basket beside the recliner, right? Grab a few of those because they will be your Christmas tree. The smaller the magazine the better, so grab your National Geos or Reader's Digests. And if you're like me and like to spray paint stuff, then you might just have some extra in the garage. If not, most stores carry the smaller cans of spray paint for less than your large fast food meal.

[one] Fold your magazine like this.


Wednesday, December 18

Emerald Smoky Eyes


Remember the other day I asked if someone would remind me to do this tutorial for you? Well, of all people, I reminded myself! I figured I should go ahead and get it done because if I put it off for too long, I'd really forget. **Ahem, celeb makeup tutorial, no mirror makeup challenge, AHEM. **

I wasn't too drawn to this emerald eye crayon from the drugstore shelf because I thought it would clash with my blue eyes. But once I had it on, though? That was a totally different story.

The thickness of the pencil made it easy to apply to my eyes and the sponge applicator on the other end smudged the color b-e-a-utifully. I wanted to show you four quick steps in applying this and achieving a smoky eye in just a few minutes. Once you have applied all makeup except for your eyes, follow these suggestions:

1) Line your eyelid with a thick line almost up to the crease. I used Maybelline Master Smoky Longwearing Shadow Pencil in Emerald Fury.
2) Blend to a little above the crease and out to the corners making a wing and apply a brown shadow to the crease to give your eye some depth. I used Mac eye shadow in Haux.
3) Line your lower lash line, including your water line, all the way out to the corners meeting with the color above.
4) Blend both lines until you achieve the smokiness and wings that you desire. I also added in a mini #ootd. Don't shoot me.

Finish this look off with two coats of your favorite mascara and a little bit of highlighter dusted on your cheekbones and your nose. You can add your favorite nude lipstick or dare to go bolder and add a pretty light pink!

[ONE]

[TWO]

[THREE]

[FOUR]


Hello Gorgeous shirt: ON (simliar) // Gray cardi: Target (old) // Plum cords: ON // Taupe booties: Gap

I'm linking up with Random Wednesday and Wildcard Wednesday.

Thursday, November 21

Brush cleaning

This is a LONG overdue post. If you wear makeup then you know it's safe and sanitary to clean your brushes every so many months. After doing the two "Catching Fire" makeup looks yesterday, I realized that I needed to clean those brushes because they were getting naaasty.

You're probably going to be grossed out, but I can't remember the last time I cleaned my own makeup brushes. There is no telling what is built up within the bristles. So I pulled out the Dr. Brommer's peppermint soap and got to work.

It's a rather simple process to clean them and I'll show you my routine. You need a bottle of very mild soap. I'd recommend Dr. Brommer's or Dial soap if you don't possess any specific brush cleaner. Grab a bowl, squirt in a little soap, and clean each brush with water. Then lay them out to dry on a rag or towel for at least 24 hours.


I was okay with just swirling the brushes around in the water for those that just come in contact with loose powders. But those that work with liquid foundations and such, I had to get my hands in the water and rub the bristles to make sure it all came out. If you use a lot of liquid or creamy products, rinsing the bowl with fresh water every couple of brushes is a smart thing to do. You don't want to be cleaning in dirty water. I lightly squeezed all the brushes once I thought they were clean and laid them out on a rag.

So that the brushes don't dry in a funky form, you can dry them for the first 12 hours on a rag like I did, but I would suggest hanging them upside down for the remaining hours. This should allow them to fluff back up to their natural form.

And there it is! Maybe by documenting this today will keep me accountable for future brush cleanings. I need to be on a better routine!!

Wednesday, November 20

Catching Fire

I'm not sure that I want to admit this, but I wasn't always a fan of The Hunger Games. I know, right?! I hesitantly watched the first movie after it was already playing on Netflix and because there wasn't really anything else I wanted to see at the moment.

As we all know, it was an uh-mazing movie. I decided that I wanted to see the second, third, and fourth movies, but I wanted needed to read the books first. So I started from the beginning. I read the first and I finished the second book today (did I mention that I'm listening to the audio books?) just in time for Catching Fire's premier on Thursday at midnight.

Where am I going with this? Well, I decided to show you two eyeshadow looks that were inspired by The Hunger Games trilogy. The first one I tried to mimic District 12's look based on the Covergirl ads--because we are all obviously behind Katniss--and the second is my own interpretation.


I used this gray color from the ELF holiday eye shadow palette all over my eyelids. 


And then I used two things for the gold color. I first applied the gold side of Covergirl's Smoky Shadow Blast in Turquoise Ember. And then applied this gold shadow below. It gave the gold a lot more depth.


The second look is something I'd actually wear to work. Instead of the District 12 "coal" look like above, I wanted to focus more on the burning embers of the coal. So there's some purples, blacks, reds, and golds to represent the fire.


I applied Korres eyeshadow in Plum to my lids, BH Cosmetics baked eyeshadow in Aphrodite to the creases, and MAC pearl eyeshadow in Expensive Pink to the inner part of the crease and inner lids, and Covergirl's eyeshadow in Shimmering Onyx to the outer corners. I finally applied that same gold shadow from above to the inner tear ducts and completed the look with some black liquid liner and mascara.

Are you ready for the premier of Catching Fire? Are there any District looks that inspire your makeup routine? Here are some of the others that I'm dying to try out one of these days.


I'm linking up with Whatever Whenever Wednesday and Random Wednesday for today's post!

Tuesday, November 19

Curling with a flat iron


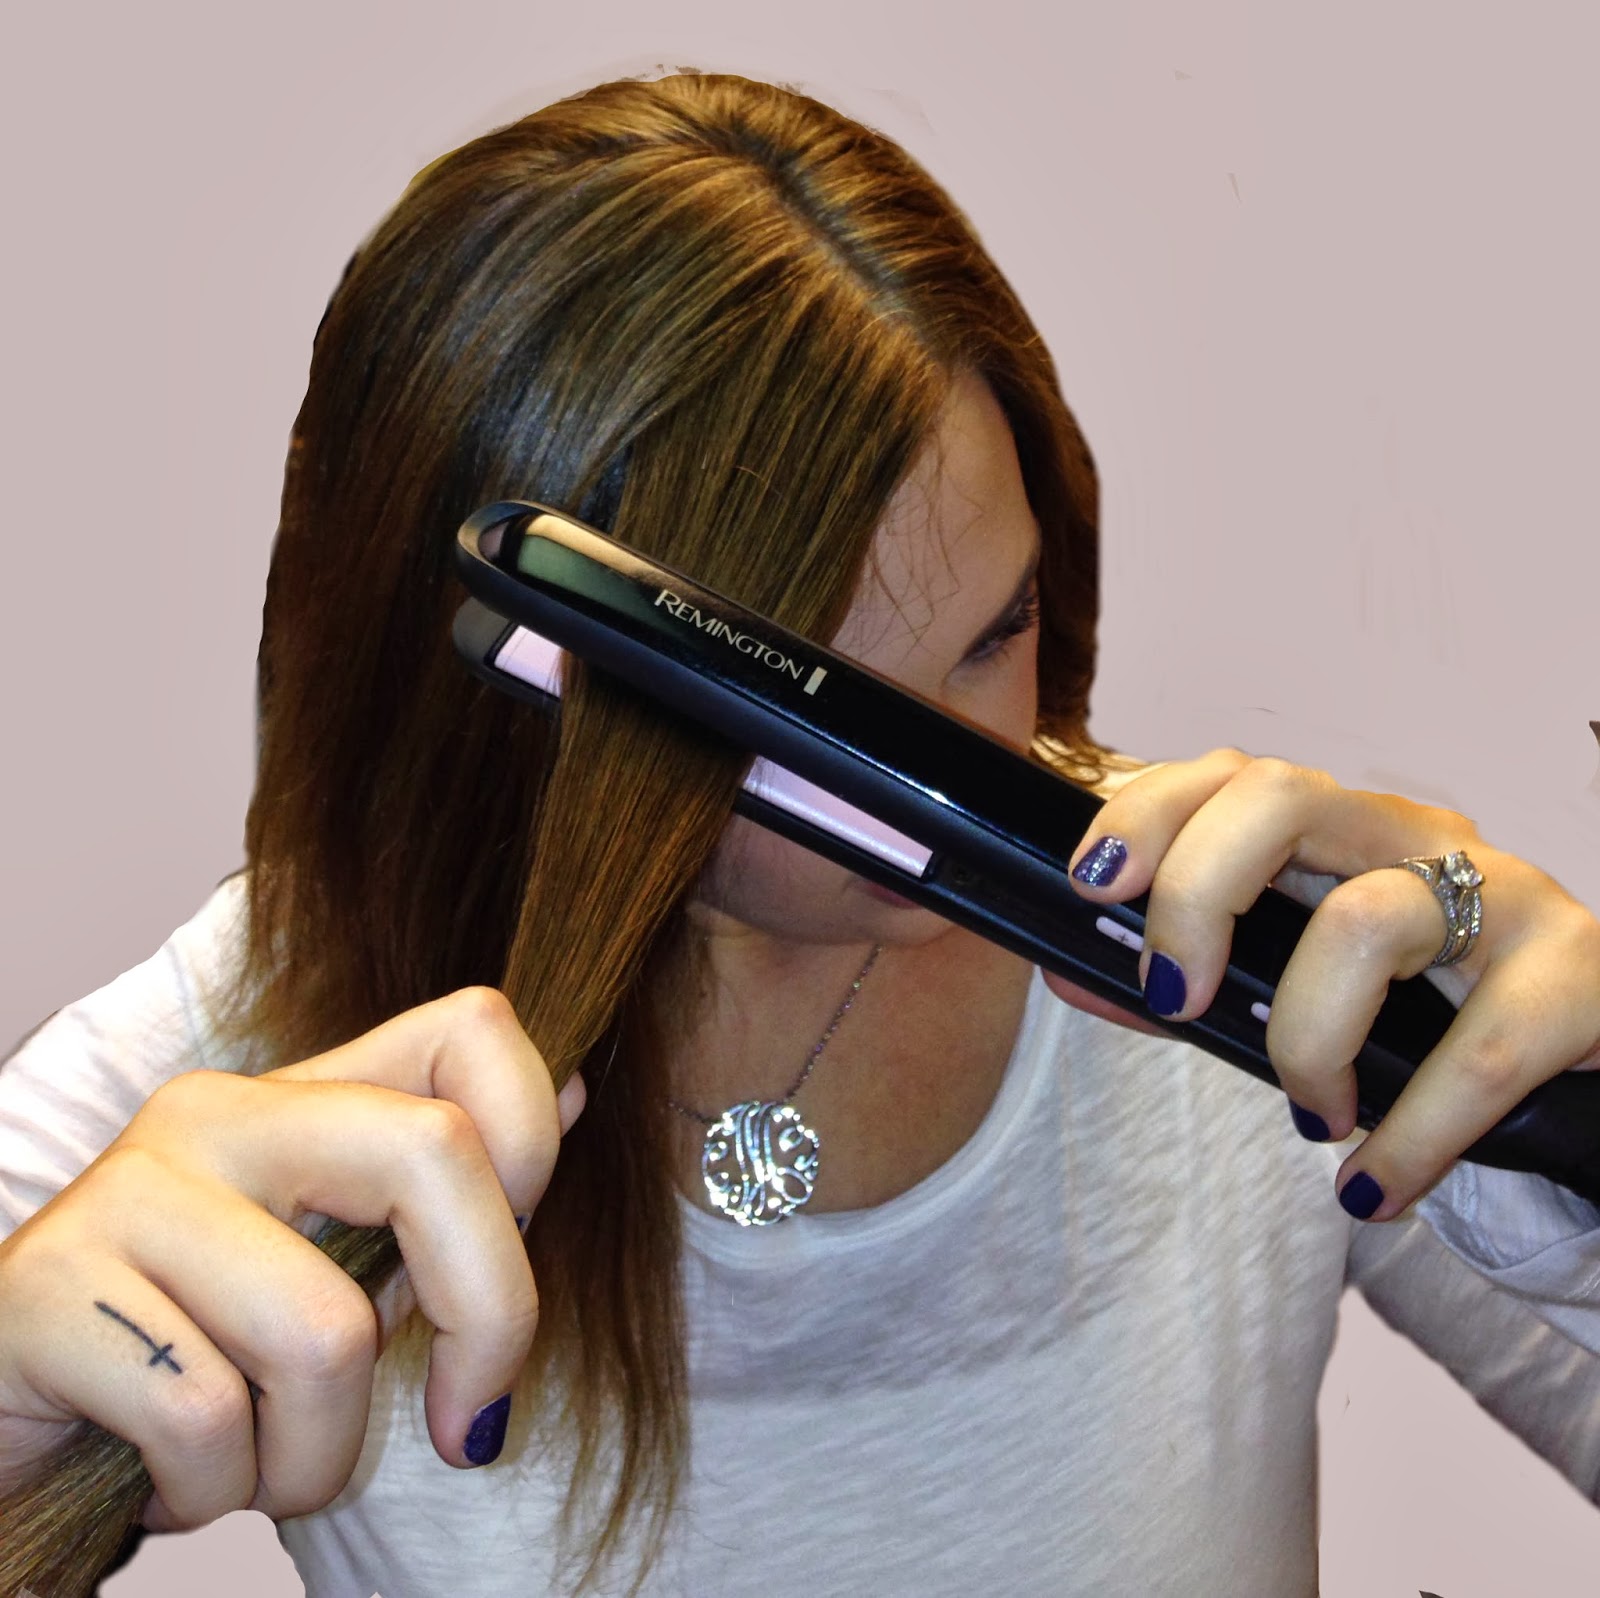
I first learned about this styling trick back in December of 2010 when I was getting my hair done for some bridal portraits. The stylist curled it using her straightener. What?! Her straightener? I know it's no big deal to curl it this way now because EVERYONE is doing it, but a couple of years ago, I had never heard of that method.

I feel like I have evolved sooo much in the beauty world from the last three years. I have perfected a winged liner, started filling in my eyebrows (which I am obsessed with), began wearing lipstick almost on the regular, and now started curling my hair with the straightener.

In case any of you have missed out on this hair method or have been hiding under a rock, then I wanted to show you a pictorial of just how easy this can be! Just keep in mind that everyone has a different way of approaching this so if what you see below doesn't exactly work, tweak it a little until you get your desired look. And if it still doesn't work, tweak it some more.

This method is a lot faster than curling your hair with an actual curling iron. And if you keep burning your fingers with a wand (like me, ouch) then maybe you should try it. [Just FYI, I've been playing around with GIMP for the pictures in this tutorial. Pardon my bad cropping, but I just had to give it a try to see what the outcome would be.]

Step 1 | Grab your hair with the flat iron as if you were going to curl it by flipping it out.


Step 2 | Twist the iron once, a full 180, and instead of pulling down horizontally, pull it vertically away from your head.


Step 3 | Pull all the way out, slowly, while making sure the end of it is going through straight.


Step 4 | The curled piece of hairs might look like a way but twist it with your finger and it will form into a curl.


Step 5 | This isn't really a step...Just continue Steps 1 - 4 until your entire head is complete. If it's easier to section it off, go for it!

My hair is so thick that it takes me about half an hour to curl it with a flat iron, maybe 20 minutes if I'm in a hurry. It's about 40 minutes with a traditional curling iron. Plus, depending on how slowly you go with it, you can create tight curls or loose waves.


What do you think? Do you have other hair tools that you can use in more than one way? For example, did you know that in addition to using hairspray to set your hair, you can lightly spray it on your face to set your makeup? Orrr, I just learned that you can use it make a temporary tattoo!

I'm linking up with My Thrifty Chic.

Monday, November 11

boho smoky eye - UD naked look no.1

(pic)
What is a boho smoky eye, you might ask? Well, I was first inspired by one of my favorite MUAs, Linda Hallberg, and she featured the eyes with a rich mahogany/rusty color. The part that made it boho was the no eyeliner and no mascara.


Bohemian looks are very earthy and one with nature. Eyeliner and mascara just don't fit, yanno? I wanted to create a similar look. And not to create the EXACT same look, here's my take on it.


I applied my makeup like normal except for my eyes. I only used one eyeshadow from the Urban Decay Naked palette to create this look. I extended it past my eyelids and gave it a rounded shape also while applying it to my lower lash line.

The color I chose was a brown/purple-y color that I knew would be just perfect aside from the rich mahogany color that Linda used above. This specific color is called "Hustle".

What do you think? Has there been a makeup/eyeshadow look that you have been dying to try? I loved that this one is something I have never done. My advice is to try everything at least once. Own it. Rock it.

Thursday, September 5

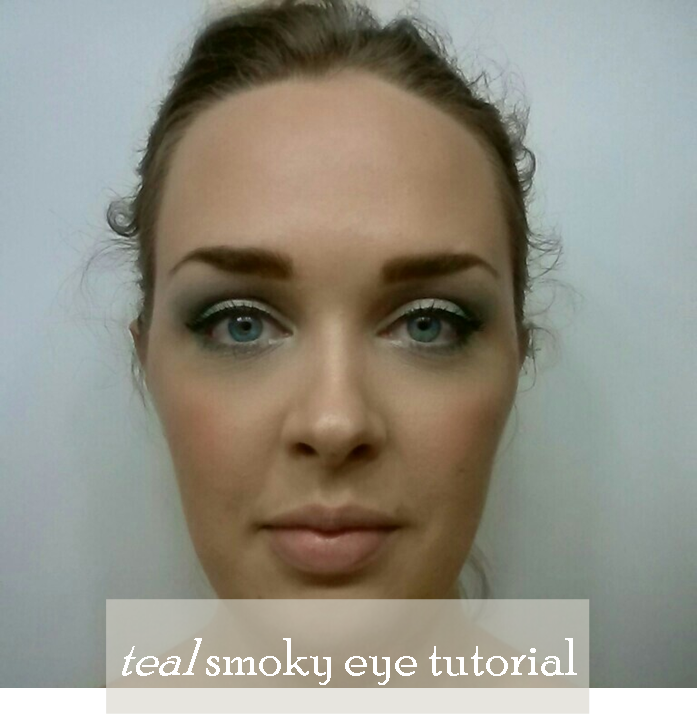
teal smoky eye tutorial


The palette I decided to use for this tutorial actually came from my August Birchbox. It was two gorgeous blue&green colors with two neutral-y colors. When I play up the colors with my eye shadows, I obviously do the neutrals but I love mixing in purples, mahogoneys, and peaches as well. But I don't really pull in many blues or teals unless it's navy because I feel like it's then a ton of blues with my eyes in on it too.

The sample palette I got last month was by Coastal Scents. I'm not 100% sure that it comes with these specific colors in the normal-size palettes, but I loved the experimentation today.


I used MAC's Paint Pot in Painterly as my base. Honestly, with this stuff in my possession, I feel like I could do anything. It's THAT good. I've said it before and I'll say it until I can't any longer. With a good quality eye shadow base, you could buy the crappiest drugstore eye shadow and it would bring out its' pigmentation in the best possible way. 

I applied the three lighter colors with my pinky finger. I hate sponges or shadow brushes because I feel as though the "true" color does not get applied to my eye all the way. My finger helps spread its' truest color. I then applied the darker teal color in the corners and along the outside 1/3 of my lower lash line with a fluffy blending brush. I use this one by MAC but any blending brush will work. I then applied black liquid liner with a little wing and mascara like normal.


I realize now that cropping pictures to just show my eyes demonstrates how crappy my picture phone is. Maybe it's time to invest in a quality camera?! Jerbear??


 I also realize that I should probably fix my hair when doing eye shadow tutorials. Bleh.

What smoky eye shadows have you tried that's not in your typical routine? I suggest you break out of your comfort zone and try blue/green combos or red/purple combos. What better Fall season to try these rich colors than now?!